RB-79 Mobile Pod Ball Ver.Ka -03
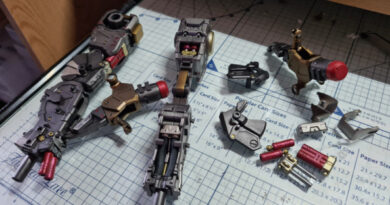
The top panels of the two RB-79 Ball Ver Ka’s were painted in the main UK Azure blue colour, with the panel lining done in a dark grey enamel to give them some depth. I had to take care fitting the top on as not to scratch the paint off the small thrusters.
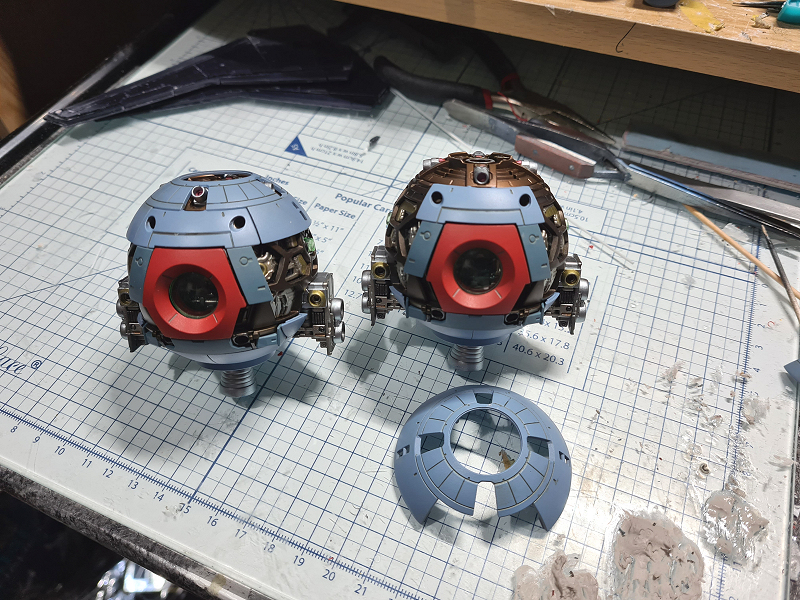
The side panels were done the same way as the top panel with again dark grey panel lining and bolt details. The small side thruster covers were pained the same “Bloody Red” as the main hatch, and the upper and lower outer grab handles in medium grey.
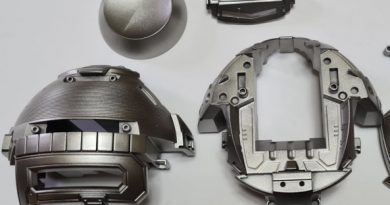
As there are a lot of parts for the manipulating arms on the RB-79 Ball Ver Ka I wanted to spend a lot of time detailing these up. Instead of the red wire that came with the kit I found in my electronics box some yellow wire of the same diameter to use instead. I painted the section the wires go through in a metallic bronze , then fed the cables through as shown in the instructions.
The inner parts of the pincers were painted in copper so they stood out when against the rest of the pincers, with rest of the pincers and first part of the manipulating arms in a light aircraft grey with mid grey enamel panel lining and detailing. As this is meant to be a snap fix kit, as expected, when putting the arms together some of the paint had to be removed from the mounting holes so as not to be too tight to fit properly.

When it came to the mounts for the manipulating arms and the lower panel of the RB-79 Ball Ver Ka I was not happy with what would have been a vey obvious seam line, so decided to alter how this section went together. Looking at it and doing test fittings I found that the back section of part D11 was not needed for the end cap (part A1) to fit. This allowed me to cut that part off the D11, so then it could just slide into the arms cylinders even if I glued parts A11 and A12 together first.
Once I had glued the two A12 parts to the lower panel I could then fill and sand the seam line to make it look more like one solid piston. This whole panel was then painted in the UK Azure blue, with the end caps and front sections in the darker IDF blue. The fine inner ring where the main thruster goes through was detailed with copper and dark grey panel details.
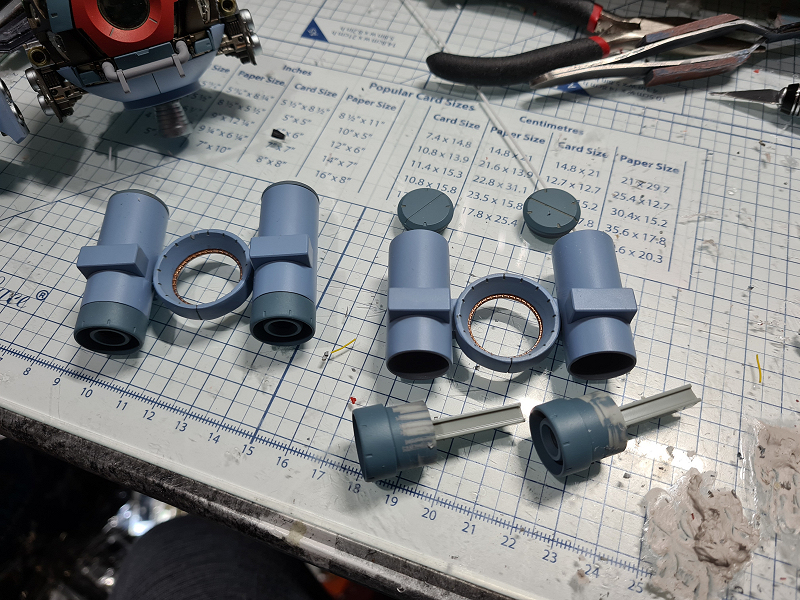
Now that the front parts and pincers of the RB-79 Ball Ver Ka’s manipulators had set, I used the same colours for the smaller single pincer and larger piston. I used some aluminium colour to represent the rod on the main piston, some darker grey to represent the fitting between the completed arms and the piston being made of some kind of material similar to rubber.
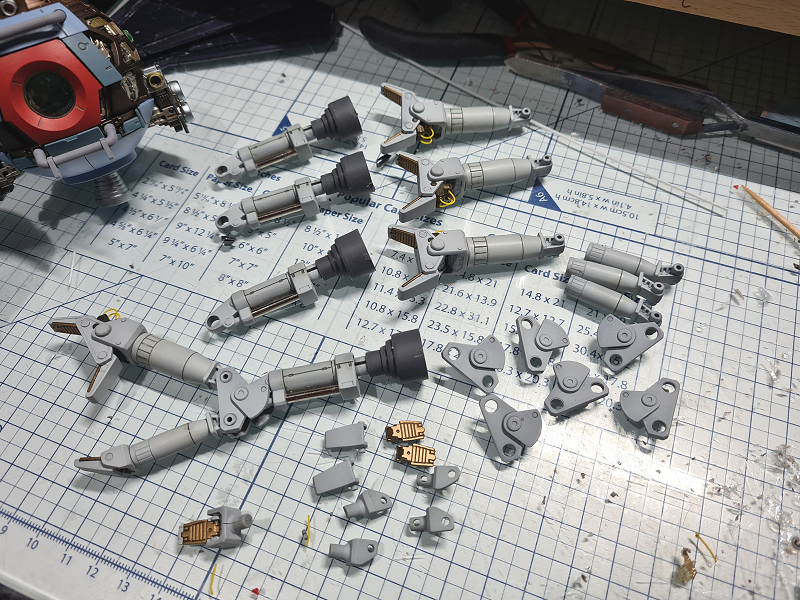
The finished arms just fitted into place using the ball and socket fixing with no problems at all. Hopefully you will all agree that the time I have taken has really proved to be of benefit to the RB-79 Ball Ver Ka’s appearance.