Bandai PG RX-78 GP01/fb – 01
This PG kit (1/60 scale) kit comes in a big box and for a very good reason, as it’s more like a 1 and 3/4 of a kit. As well as a “standard” RX-78 you also get all the add on GP01/fb armour and thrusters, a complete extra core fighter and a girder frame for mounting the extra armour parts onto.
I’m going to use a lot of the girder parts in a hangar diorama for the RX-78 being serviced showing some of the inner frame that would usually be covered up. The plan is to later build a smaller diorama for the extra core fighter and some other armour parts.
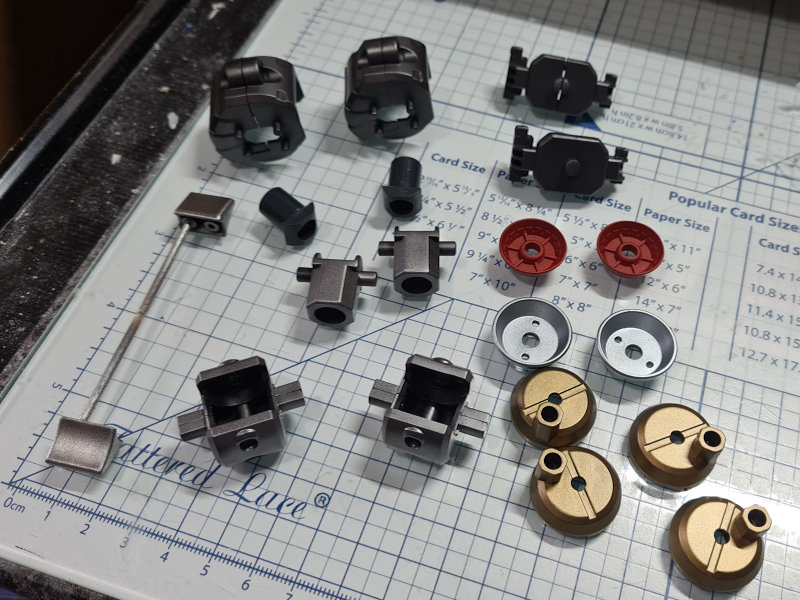
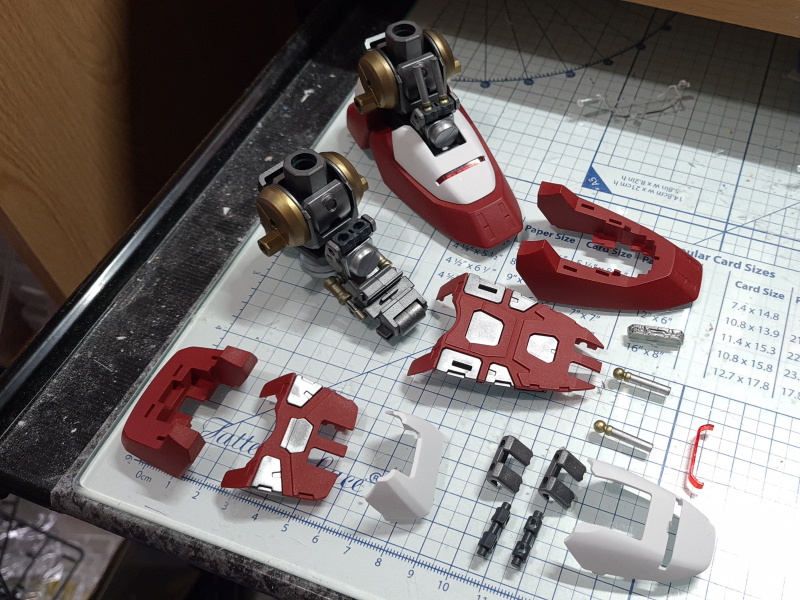
Time to start on the kit and as the instructions do in building the feet. I used mainly Vallejo’s Model Color Steel and Gun Metal for the ankle joints and foot parts, then used Pale Brass, Stainless Steel and Red for the feet’s thrusters and side pieces.
As well as the usual snap fittings these kits also have small screws to hold parts together. I came across a problem with the side ankle pieces in that the mounting pins were just a bit too wide where they flattened out as they fit just one way.
This was easily solved by just cutting away at the edges to allow the part to fit into place. Once this had been done the side pieces pushed into place and allowed me to finish building the ankle joint.
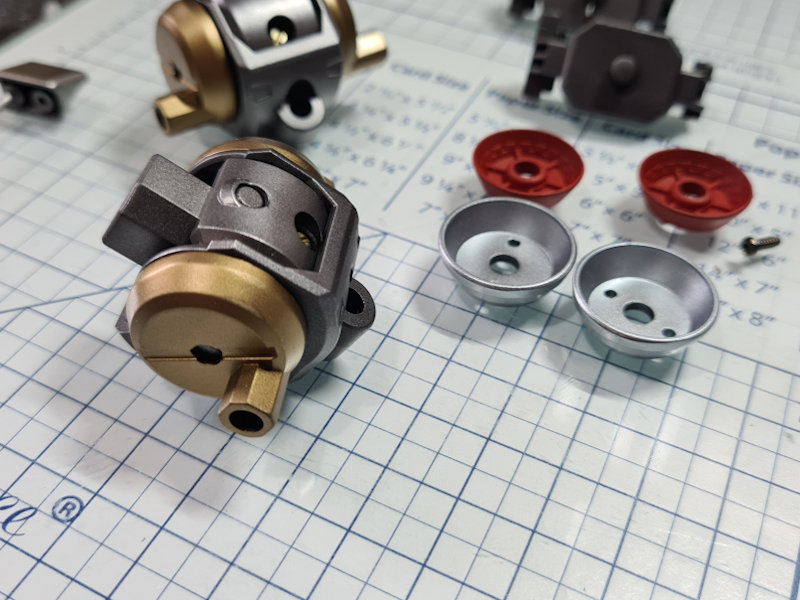
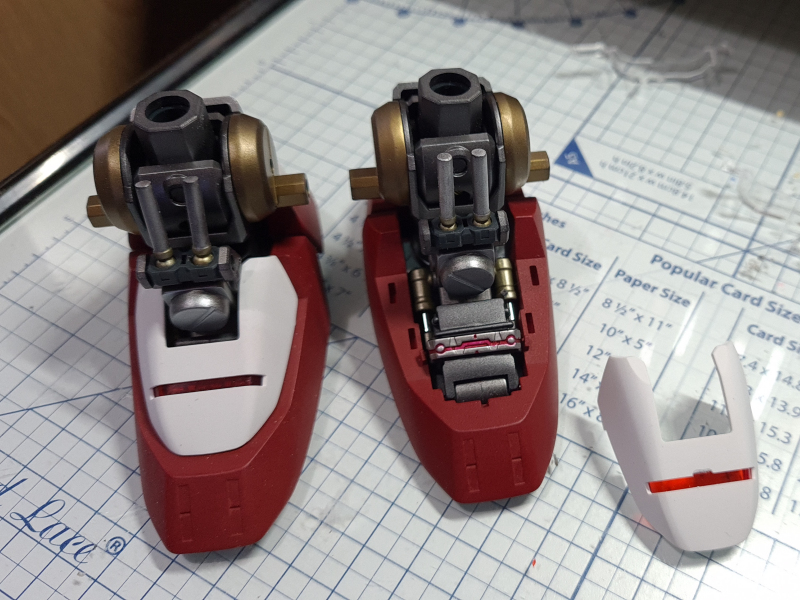
Next, I painted the lower foot mounts and pistons. I painted the main pistons and the lower mount points in gold just for some highlights, so they show up against the darker gunmetal.
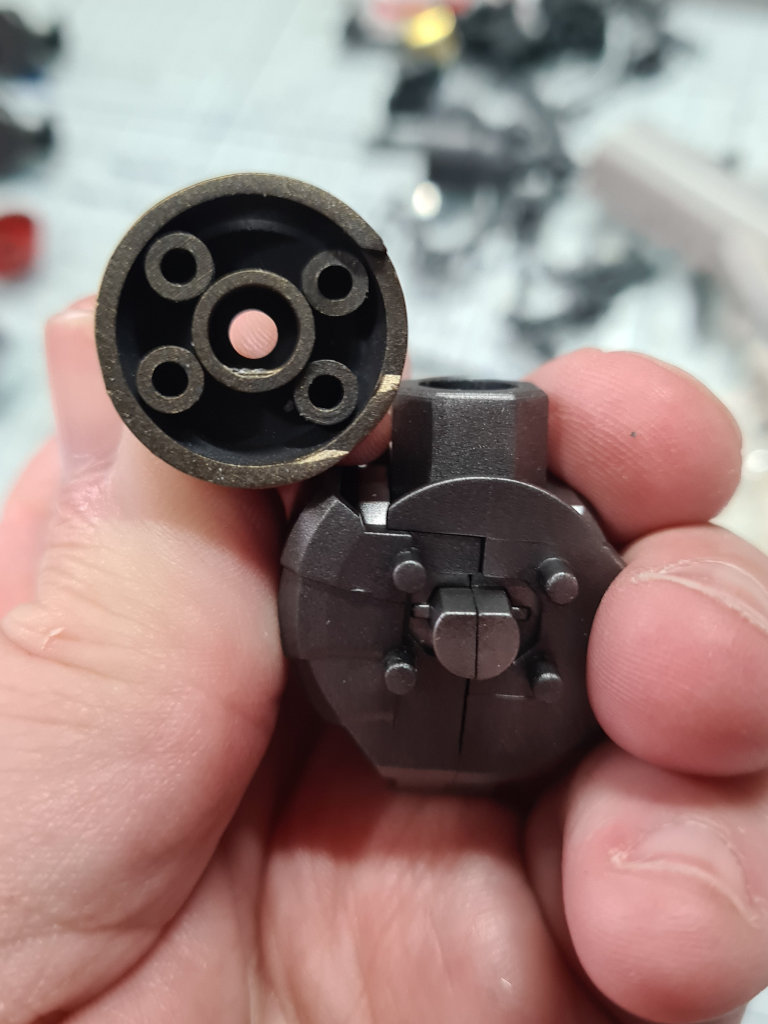
Now I saw something that just did not seem right at the front of the foot is a piece with a slit that points to one side. The instructions say to make the two feet identical, but when the model is completed, to me, would not look symmetrical. To resolve this, I just cut away at the mounting pin then glued one of the pieces going the opposite way.

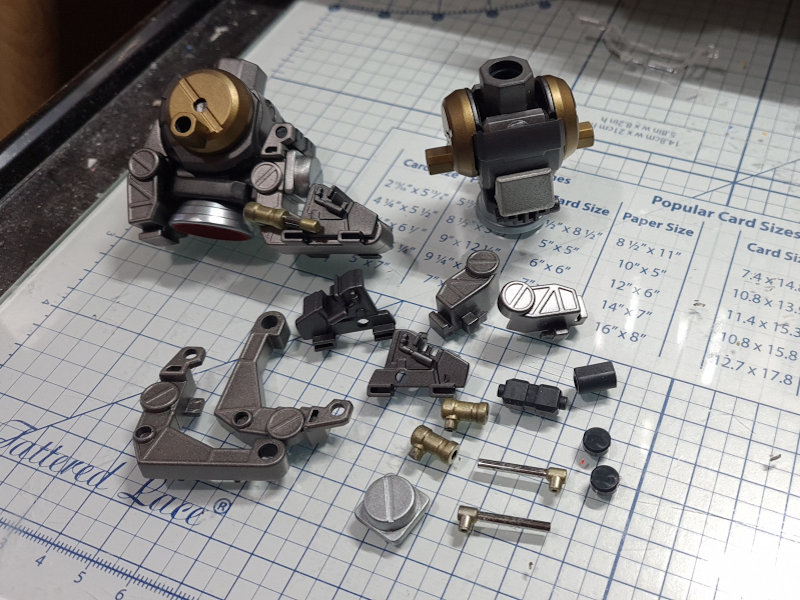
The actual foot was painted in red with stainless steel for the tread sections. The upper part of the foot was painted white and details on the pistons rods and front section done in gold and bright gloss red. One of the feet will have the white section left off to reveal the inner working and the painted pistons. and the white part will be put to one side for now.
Here are the two finished feet and as you can now see the alteration to the position of the front slit piece makes it look more like the RX-78 having actual left and right feet.